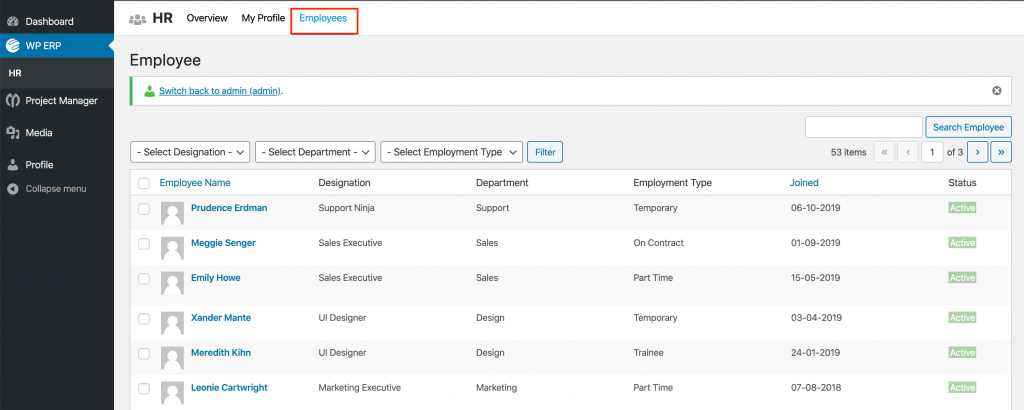
You may often think, How to hide the Employee list in WPERP. In WPERP, when the Employee login, they can see the list of all Employees. Though they could not see any information that can cause other employee privacy. Employees can see the other Employee list and they can see their profile which contains only Email and Contact number.
An employee can see other employees list
This is actually a default feature of WPERP. It lets the Employees see other Employee profile with just the contact information with the sense that, one Employee may require to contact with another, in their purposes. So, having contact information visible is good to have good communication withing the Employee.
However, as I provide support for WPERP, I got queries sometimes that they do not want to let the other users see the Employee list. That seems a privacy issue to them and they are concerned with it.
I do help people with this by guiding them on how they can hide the Employee list for the other Employee. As I do get the same query often, I think it’s good to write about it that people can find it easily.
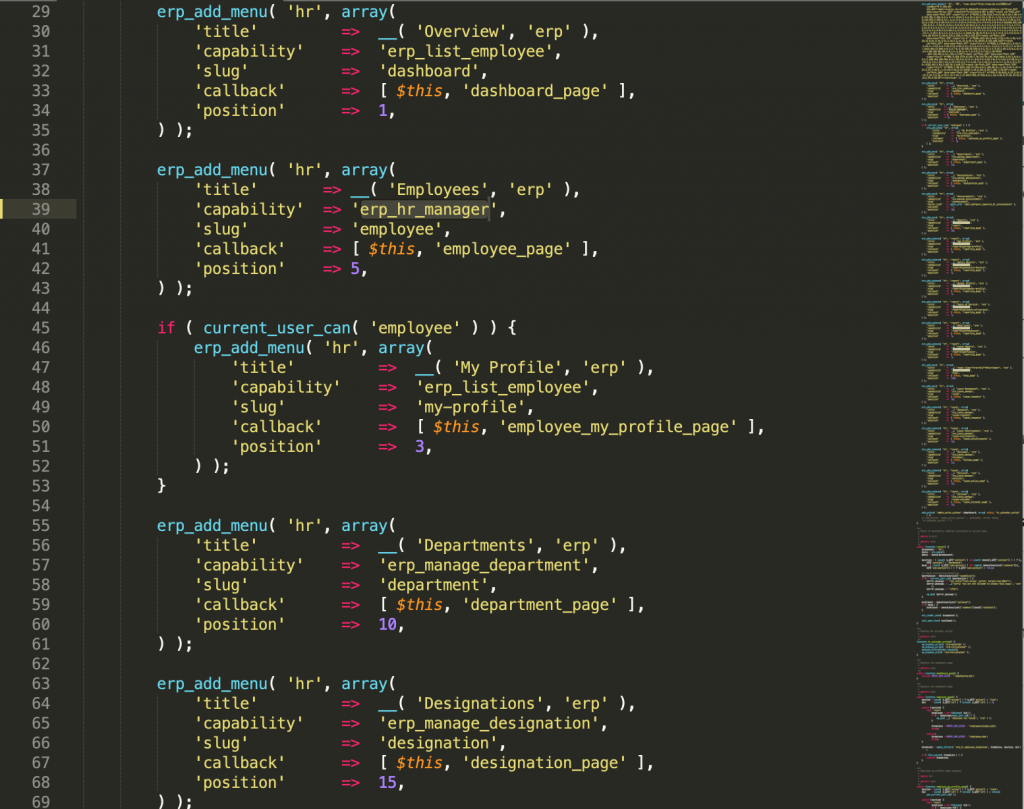
How to hide the Employee list in WPERP?
Well, it’s a simple trick, which you need to change from codes. Just open the file: /erp/modules/hrm/includes/admin/class-menu.php in the line number 39, Replace the erp_list_employee by erp_hr_manager
Having well-managed documentation can increase your product interest and sales! Yes, I mean it. You can consider documentations as the story of your product. People can read them, people can understand your product by reading them, people can refer them to others.
Physical, virtual or Digital, documentation is important for all kinds of products. Physical products often come with the printed user guide book but people can lose them easily and they might need help when they do not have the guide book on hand.
And for the Digital and virtual products, online documentation is the must-have thing to explain your product to the user/customer.
Why Documentation?
Say you have an Electronics business or you run a software company. You have your own product to sell to the customers. How do you guide your customers to configure the things after purchase? Telling individual customers by providing email support is difficult, plus time and resource-consuming.
Let me say a real-life story happened to me. I brought a Kryptonite lock that came from the USA a few months ago. I got a clip with it to hang the lock on the bike. I was struggling with how to set this clip with bike, not even following the user manual. Later, I search online and found their official documentation on it which was well described with the necessary images that helped me to get rid of the thing.
That’s just a story happened to me. This can happen in many cases, with any kind of product.
I’m a Support Engineer of a software company, where one of my responsibilities is to make our products understandable to the user/customer. So, most of the time, I observed, having documentation saves our time. 50-60% of users get their query answers directly from the documentations. We also do provide the documentation link when a user/customer asks how to do that, which covers most of the user queries.
It’s really easy to make them understand if you have a well-decorated/written documentation about the features, how it works and how to configure it.
How I can create online documentation?
Well, things are not that complicated if you have a WordPress site already. If you don’t, you can search google on how to create a WordPress site. The thing that’ll require:
I’m assuming you know how to point a domain into a host and create a WordPress site. If you don’t, I can help you.
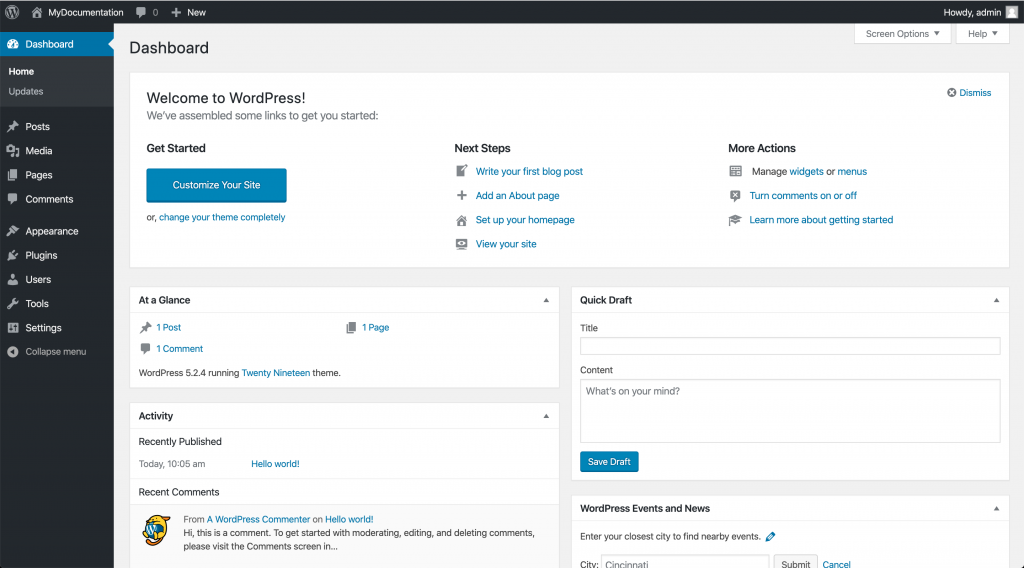
Let’s say just created a website with WordPress for documentation. Here’s the backend I got.
Newly created WordPress site for Documentation
Great! We have the WordPress site means, we are 60% done creating our own documentation site!
Now, you just need to choose a plugin and an appropriate theme to have the Documentation feature on your site. I have tried several documentation plugins but found only one who is really nice and easy to use. weDocs, which is completely free to use!
weDocs is free yet super convenient for managing your product documentation.
How to install and active weDocs?
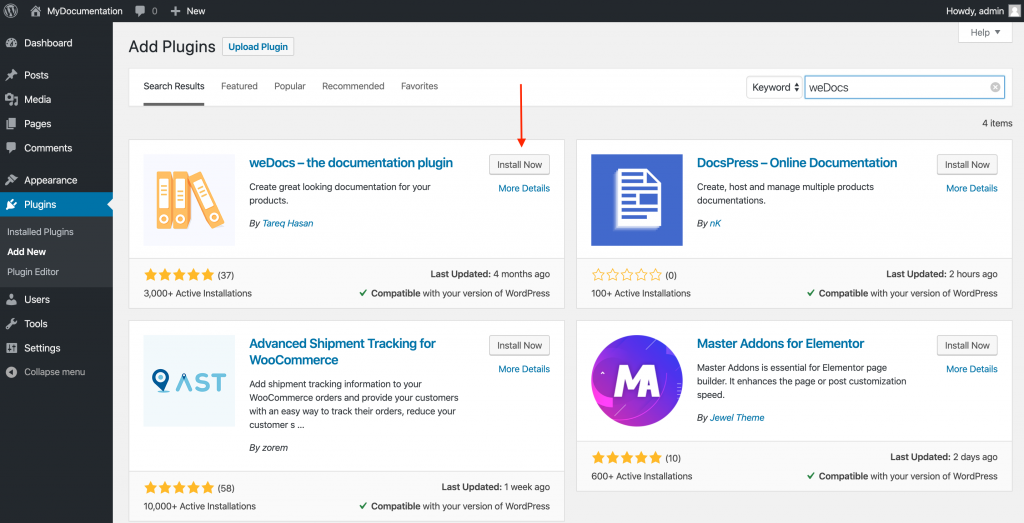
We’ll install the weDocs plugin first by simply navigating to your website dashboard→ plugins directory. Just search with the name ‘weDocs’
Installing weDocs on the WordPress site
Click on install now and then activate it when the installation is complete.
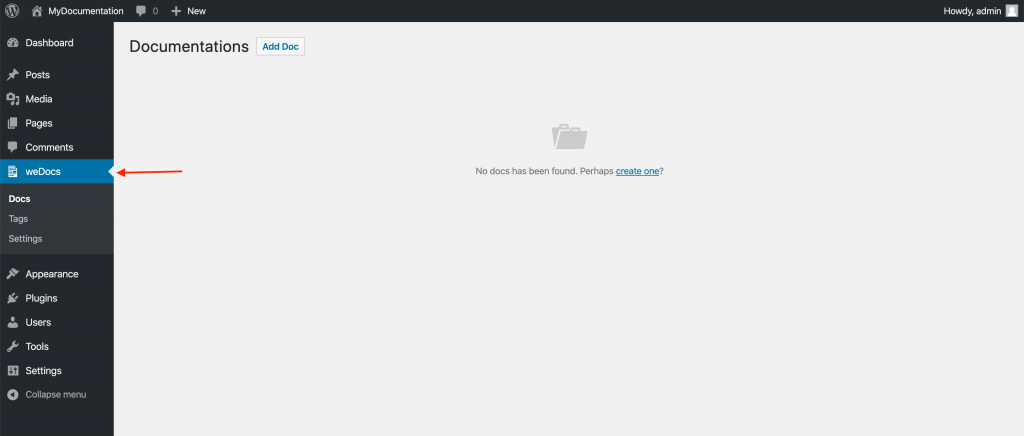
We’ll get the Docs menu on the left menu bar in WordPress dashboard after activating the plugin, as like the screenshot below:
Documentation menu
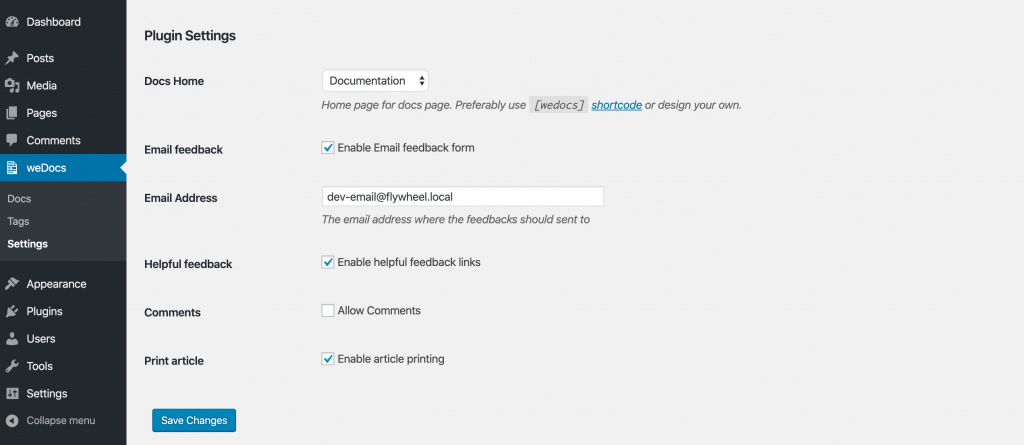
Let’s complete the basic setup. Navigate to wp-admin→ weDocs→ Settings to get the weDocs settings that need to configure based on your requirements.
There is 6 simple thing you need to check up before creating the documentation. The page where you like to show the documentation if you want to allow comments, printing documentations, feedback and so on.
weDocs settings
Note: Make sure your site URL is set to post name from the settings→ permalinks.
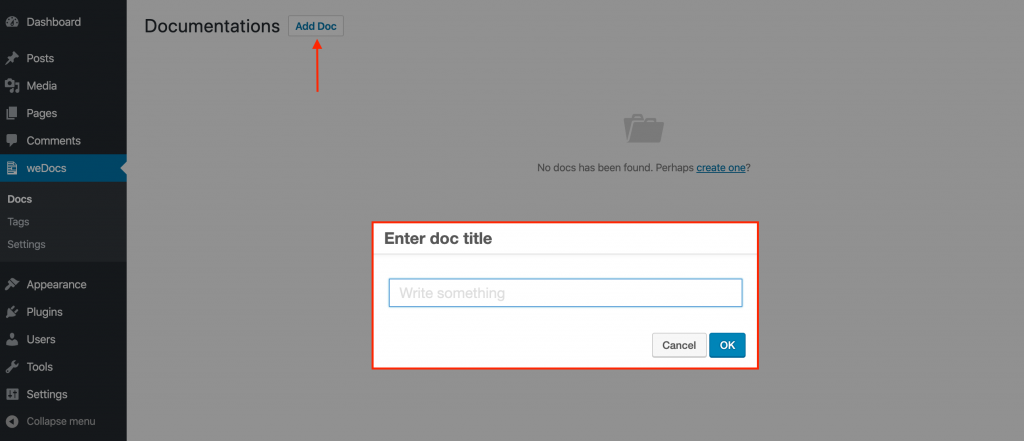
Now, let’s go back to the documentation. Click on the ‘Add Doc’ button to create your first documentation!
Creating new documentation
Give an appropriate title for your documentation and click on the ‘Ok’ 🆗button!
Documentation sections
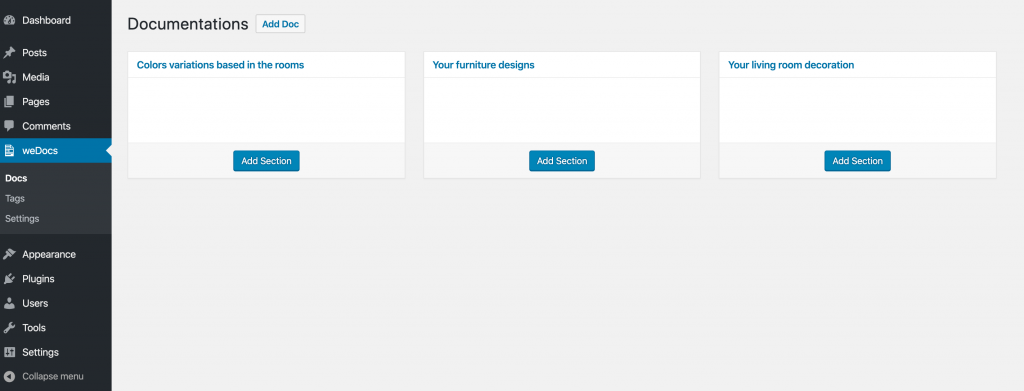
I have created 3 different documentations parent category with their appropriate names. Now, before creating the documentation, we need to create sections for individual category and the documentation will be under the individual sections.
Documentation sections
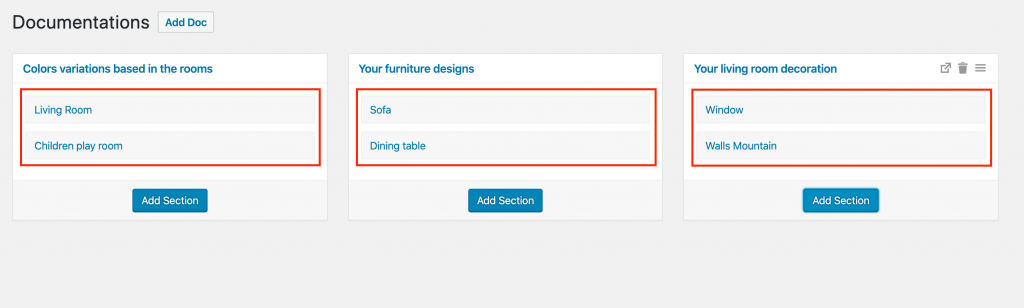
I have created two sections in each parent category. Here you go, you can create your documentation now under the sections.
Hover your mouse over the section, you’ll get (+) icon to create a new documentation article. Click on the (+) sign to create your very first article 👏
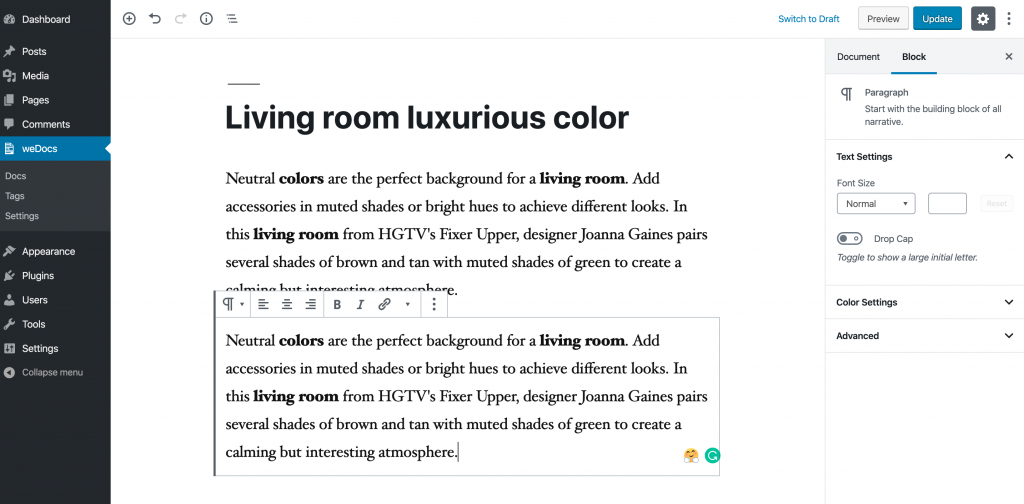
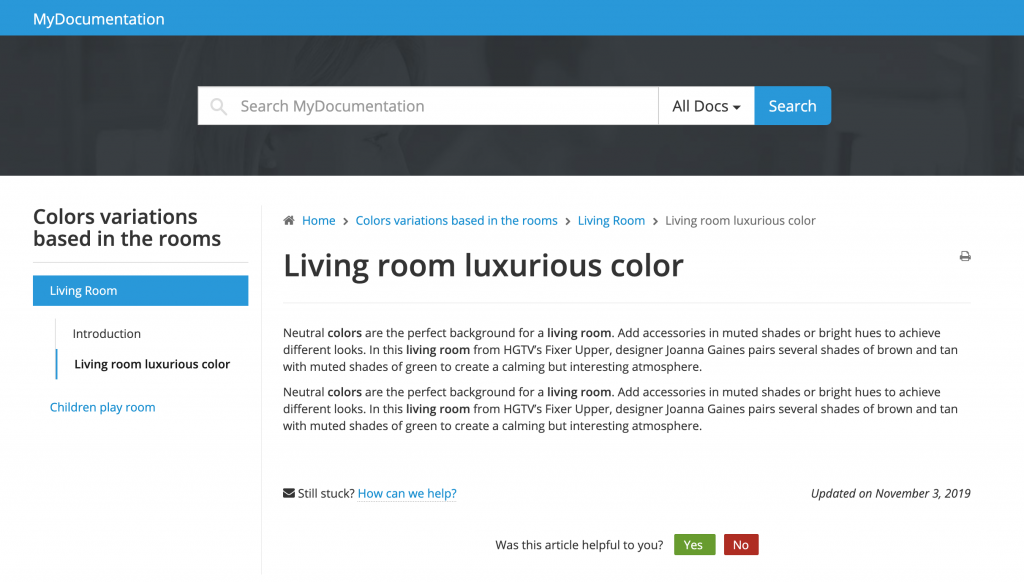
Give the article title, click on ok to save it! Now, click on the article title to write the article details as you generally write a WordPress post.
Writing the documentation details
After writing your article details, click on ‘Update’ to finish it.
Well, we are almost done! I have now one documentation article created now. You can see it on the frontend of your website.
Documentation in the Frontend
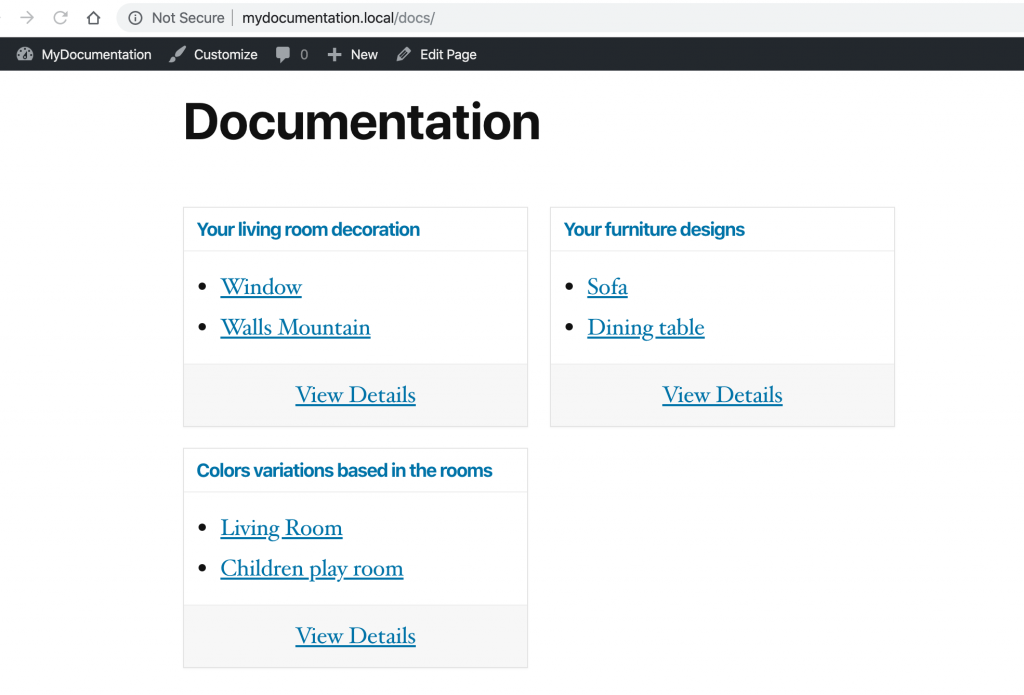
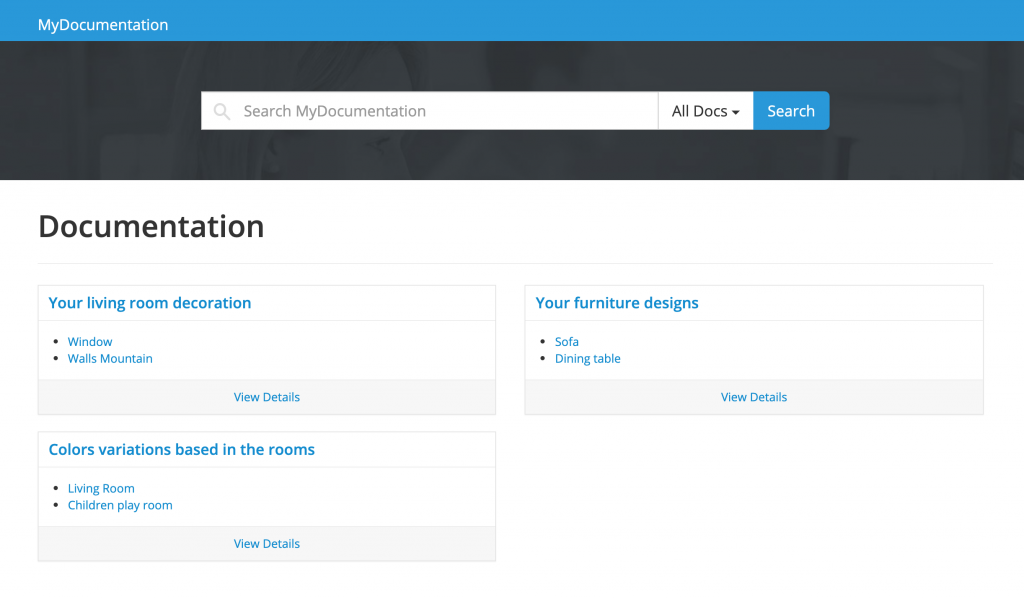
Now, think, you have several categories, sections and documentation created, Fine. So, how to list them on a page where you like to show all of the available documentation?
Simple! Just use the short-code `[wedocs]` on the page where you like to show the documentation list. Here is my page where I used the `[wedocs]` shortcode to render the docs.
Documentation list
Not happy with the frontend design? No worries, weDocs has a default theme for it as well which is pretty enough 🙂
weDoc theme
You can get the theme from this direct GitHub Download link. You can install the theme by navigating to the Appearance→themes→Add new.
Frontend design after installing the weDocs theme
See, it looks different in both the Docs listing and the docs details in frontend. Looks good, hu? But you can give it a better look than this if you are known with CSS. A little bit of custom CSS can make the look more pretty like the weDevs documentation is 🙂
Creating, managing and reaching with the customer/user with documentation is easier now. It’s even totally cost-free if you have an existing WordPress site.
Documentation created with weDocs is highly SEO friendly as well as it has the Schema Rich Snippet with it by default, which will help you to get index in the search engines easily.
It helps to get the user feedback as well whether the documentation you wrote for your products are helping your reader/users/customers or not. weDocs comes with the feedback feature with it by default.
So, as creating a documentation site is not so hard, you should definitely consider creating an online documentation site if you own a product that requires you to guide the user about its use.
Pro Tips: People can follow product documentation before purchasing it, so, make it attractive, clean as much as you can 🙂
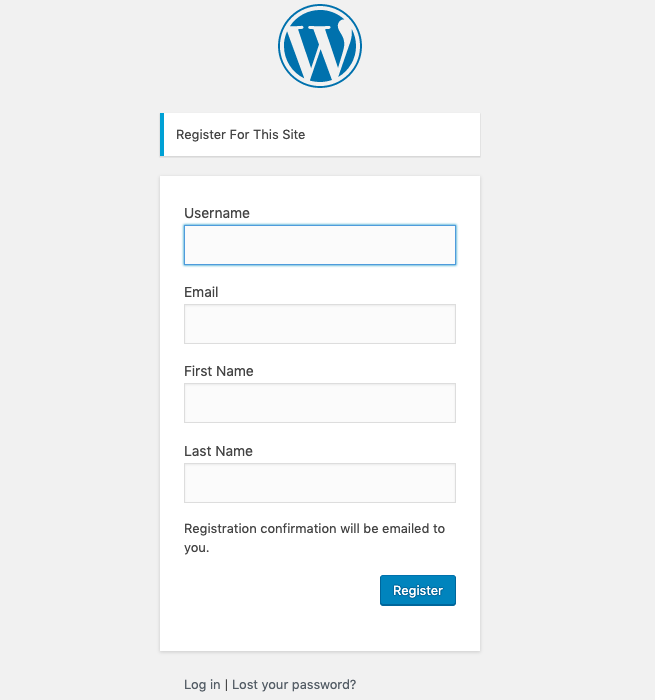
How to add custom fields in the default WordPress registration form?
Disclaimer first! I’m not a coder but sometimes I love to play with codes. I got a task to add the first name and last name field on the default WordPress registration form, for a reason. So, here is the output!
Before starting, I have googled and found out some tutorial. Most of them are kinda hard to understand, especially for the noobs like me. I mean, who just started to play with PHP.
I have followed/read several articles on how to add custom fields on the default registration form. I got the idea on available actions that WordPress provide from them. Then started writing my own.
So many tutorials available out there on the same topic I’m writing but I have tried keeping it as simple as I can.
Before starting, we need to find the available action/filters that WordPress provides and usages on the registration process. Read the code below:
Here, register_form is an action, available in WordPress. And wedevs_registration_form is the function we have declared. The rest is HTML to take the First Name and Last Name input fields to print on the registration form and to take data/value from the user.
Printing/adding two fields on the registration form is done. You can check it now.
Well done! Now, what if the user registers with that form? Will the inputted names be saved on the user profile? NO. It won’t. Because we have not told the system to save them yet!
Before saving the data, we actually need to validate the fields. What will happen if the user keeps First Name and Last Name blank where you like to have the mandatory? It needs to provide an error that you have not provided your names. Right? Let’s do it!
// Field validation
add_filter( 'registration_errors', 'wedevs_registration_errors', 10, 3 );
function wedevs_registration_errors( $errors, $sanitized_user_login, $user_email ) {

	if ( empty( $_POST['first_name'] ) || empty( $_POST['last_name'])  ) {
		$errors->add( 'first_or_last', __( '<strong>ERROR</strong>: First or Last name is missing', 'wedevs' ) );
	}

	return $errors;
}
The filter we user registration_errors , provides by WordPress and we had to declare our function for validating the names. We used wedevs_registration_errors, you can use your own. I kept a single error for both of the fields, first name, and last name. You can have separately as well.
Well, fields validation is done. Now, we have to tell the system to save the field value if the fields are not empty. Here we go:
We need to use action user_register provided by WordPress. And same declaring the function our own. Here, if the field first_name is not empty, then update the user meta with the value of first_name.
Same for the last name.
We have written the whole code but I have not mentioned where to add these codes? Haha! You can have the codes in two way. Inserting these codes on your theme/plugin functions.php or, you can simply create a plugin for this!
Creating a plugin, OMG! Sounds hard, right? But trust me, it’s an easier task than you did last few minutes. Let me mention the process:
Create a folder naming ‘Custom Fields in Registration’ (You can have it your own name)
Create a PHP file naming functions.php and save into it.
Insert your codes on that functions.php file.
This is it? I’m sorry but no. You need to add few lines top of the functions.php to tell the system it’s a plugin that you can install on your WordPress system. Here is a sample:
<?php
/*
Plugin Name: Custom Registration Form
Plugin URI: www.thebengalboy.com
Description: This plugin will add two extra fields on your default registration form.
Version: 0.1
Author: Mehedi Hasan
Author URI: www.thebengalboy.com
License: GPLv2 or later
License URI: http://www.gnu.org/licenses/gpl-2.0.html
*/
Declaring this in the top will make your simple and single coded file into a WordPress plugin.
Now, you can zip the folder and install it on your site. It will add two extra fields for First Name and Last Lame on your WordPress registration form.
I found a conflict between the WP Project Manager, a leading WordPress based Project Management solution and the Awesome Support plugin a few days ago. Not a major conflict but if someone has both the WP Project Manager and Awesome Support plugin installed, the email address field in the Awesome Support registration form doesn’t show.
I found the function that is conflicting widely used in WP Project Manager. So, it’s not possible to change that particular function with the WP Project Manager instantly or at least, at this moment.
But, I found an alternative way to get rid of it. You can implement it as a temporary solution.
And comment out the line number 11 & 12. Following codes:
function email( $value ) {
    return is_email( $value );
}
After commenting out the above, reload the Awesome Support Registration form. See! the Email field is there.
Note: I have not found any impact of disabling the function in WP Project Manager yet. So, I’m not sure where you are going to get stuck but it fixes the conflict problem for now at least.
WP User Frontend is a form builder which let you create custom post and registration form. It has plenty of custom fields available for both post form and registration form, you may already know that.
I”ll not discouss about the features of WP User Frontend here, rather you can find it here.
WPUF- is the short form of WP User Frontend and I’m going to use this rest of my post.
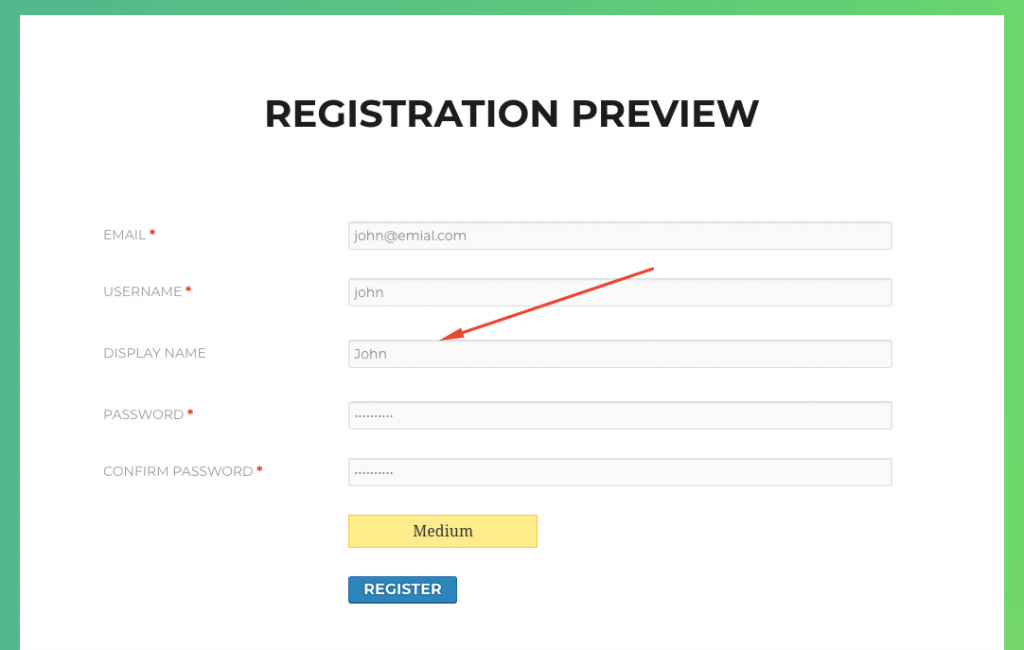
However, with the WPUF ‘username’ filed, you can validate the duplicate username of your site. Like: someone used ‘John’ as a username while registering but someone already has registered with this name. So, it will validate the name and provide a notice to the user that someone already taken this name, you need to choose any other name.
That’s all good! but what if you like to validate the Display name as well? The default Display Name field of WPUF doesn’t offer to validate. Actually, most of the cases, it doesn’t require to validate the Display name as Display name can be the same for several users, it doesn’t really matter.
[irp]
Some days ago, one of our WPUF users needed this and we came with a solution for this. Actually, I was taking care of him but he created the snippet his own and shared with me to provide it to the people, if someone needs in the future. Kuddus to #Chris Arnold
Here is the snippet he used and shred with me:
// CUSTOM -- if any display name given, check if it exists

if ( $this->search( $user_vars, 'name', 'display_name' )) {

$display_name = sanitize_user( trim( $_POST['display_name'] ) );

global $wpdb;

$query_cnt = $wpdb->get_var( $wpdb->prepare( "SELECT COUNT(ID) FROM $wpdb->users WHERE display_name = %s", $display_name ) );

if ( $query_cnt == 1 ) {

$this->send_error( __( 'Sorry, Display Name is already in use. It needs to be unique.', 'wpuf-pro' ) );

}

}
Use this snippet on your function.php file. The Display name should validate now on the WPUF registration form 🙂
In some cases, weForms users face the blank screen on the weForms settings if they have the LearnPress installed. The same may happen for the LeanPress settings or both of them.
Insert this snippet in your theme function.php file and save it.
Note: It’s good to have a backup before adding codes to a file. Please make sure you have taken a complete backup of your site or the file you are editing.